Building a Shopping App with Javascript and IndexDB
Ezekiel Lawson
21 Apr 2022
•
9 min read
In essence, the Shopping App is an online shopping companion that makes it easy to buy the things you desire and track your transactions.
In this article, we will not only focus on explaining what IndexDB or Workbox is. We will give detailed steps to follow when building this application for a smooth development experience We will be working with Dexie.js and IndexDB for offline storage and Workbox for generating our service worker.
Prerequisites
This tutorial assumes you have:
- Basic understanding of Javascript
- Familiarity with arrays, DOM, functions, and objects
However, no prior knowledge of IndexDB, Workbox, or Dexie.js is necessary. This post will show you how to make a shopping app in Js that keeps your data offline by using IndexDB and Workbox to build our service worker. This is the table of contents for this article:
x200B;
- Brief Intro to IndexDB, PWA, Workbox
- Creating and styling Shopping app with HTML and CSS
- Setting up Dexie.Js
- Adding a new item to the IndexDB database
- updating data in IndexDB
- Displaying items in the Shopping app
- Deleting Data from our Database
- Setting Up Workbox for PWA
Brief Intro to IndexDB, PWA, Workbox, Service Worker
IndexDB
IndexedDB is a browser-based large-scale object-store. It's ideal for apps that need to store a lot of data but don't require a constant internet connection. Simply said, it is a method of storing data in a user's browser for a long period. Your apps can run both online and offline since it allows you to construct web applications with extensive query capabilities independent of network availability.
Progressive Web App (PWA)
A Progressive Web App (PWA) is a website that has all of the features of an app. PWAs allow you to create a version of your website that is faster, more dependable, and more engaging. Aside from that, you can use some functionalities completely offline.
Workbox
Workbox is a set of JavaScript libraries that aid in the development of Progressive Web Apps with service worker functionality. It includes a suite of libraries that may be used to add an offline capability to your web apps. Workbox is a collection of libraries that make writing service worker code simple. It can be integrated via CDN or CLI
Service Worker
A service worker is a script that runs in the background of the browser. It can detect network requests and pick what to load on the user's side. They effectively function as proxy servers between online applications, browsers, and the internet. For security concerns, service workers only execute via HTTPS.
Creating and styling Shopping app with HTML and CSS
This code section covers the structure and design of our grocery app
HTML Code
This section is divided into three categories. The first section is the header which contains information about the app, the second section contains the form input for the prices, name of the item, and quantity. The last section is for the total price of the items.
<!doctype html>
<html lang="en">
<head>
<meta charset="utf-8">
<meta name="viewport" content="width=device-width, initial-scale=1">
<meta name="description" content="A Progressive shopping app with HTML CSS AND JAVASCRIPT">
<link href="https://fonts.googleapis.com/css2?family=Karla&display=swap" rel="stylesheet">
<link rel="stylesheet" href="css/animate.min.css">
<link rel="stylesheet" href="css/style.css">
<link rel="manifest" href="./manifest.json">
<title>Grocery App</title>
<script src="./dexie.min.js"></script>
<script>
if ('serviceWorker' in navigator) {
window.addEventListener('load', () => {
navigator.serviceWorker.register('./sw.js');
});
}
</script>
</head>
<body>
<header>
<h1 class="heading animate__animated animate__bounceInRight">
Shopping Made Easy With Grocery App
</h1>
<p class="paragraph">Grocery App helps you to organize and priotize your list and keep them on track ✔✔✔</p>
</header>
<main class="main-section" id="">
<section class="item-section">
<!--=========== Add item input section ============= -->
<div id="createNewListDiv">
<form id="itemInput">
<label>
<input type="text" id="nameInput" required placeholder="Name of Item">
</label>
<label>
<input type="number" id="quantityInput" placeholder="Quantity">
</label>
<label>
<input type="number" id="priceInput" placeholder=" Price">
</label>
<button type="submit" id="addItemButton"> <span class="plus-sign"># 10010</span> Create
List</button>
</form>
</div>
<!--=========== end of add item section ============= -->
<!--=========== Delete item section ============= -->
<section>
<div class="itemContainer">
<!-- new item section -->
<div id="newItemsDiv"></div>
<!-- delete all items -->
<div class="deleteItemConatiner">
<button id="deleteAllBtn" onclick="deleteAllItems()">
Delete all Items
</button>
</div>
</div>
</section>
<!--=========== End of Delete item section ============= -->
<!--=========== total price of item section ============= -->
<section class="totalPriceSection">
<div id="totalPriceDiv"></div>
</section>
<p class="Emilson">Made With ❤ ❤ ❤ By Emilson</p>
</section>
</main>
<script src="js/index.js"></script>
</body>
</html>
CSS Code
This section contains the stylings for the HTML elements, such as font size, background color, font family layouts, and responsiveness of our app.
* {
  margin: unset;
  padding: unset;
}

body {
  font-family: 'Karla', sans-serif;
  -webkit-font-smoothing: antialiased;
  background-color:# 1b1a1b;
  color:# ededed;
}

header {
  margin: 30px 0px;
}
.heading {
  color: 000000;
  font-size: 1.7rem;
  font-weight: 700;
  /* text-align: center; */
  padding: 0.9rem 2.9rem;
}

.paragraph {
  color: 000000;
  font-size: 1.0rem;
  /* text-align: center; */
  padding: 0rem 2.9rem;
}

.main-section {
  padding: 3rem 12rem;
}
deleteAllBtn {
  border: unset;
  color: white;
  border-radius: 5px;
  cursor: pointer;
  display: flex;
  justify-content: center;
  background: transparent;
  font-size: 1rem;
  font-weight: 700;
  padding: 1rem 0 .5rem;
}
itemInput label {
  /* display: block; */
  margin-bottom: 2rem;
  font-size: 1.3rem;
  font-weight: 700;
}
itemInput {
  display: grid;
  grid-template-columns: 1fr 1fr 1fr 1fr;
  grid-gap: 15px;
  place-content: start;
}
itemInput input {
  height: 3.5rem;
  text-align: center;
  border: 1px solid# bfbfbf;
  /* display: flex;
    justify-content: space-around; */
  width: 16rem;
  font-size: 1rem;
  /* text-align: start; */
  padding: 0 0.2rem;
  outline: none;
  border: none;
  box-shadow: rgba(50, 50, 93, 0.25) 0px 2px 5px -1px, rgba(0, 0, 0, 0.3) 0px 1px 3px -1px;
  background-color:# 3E3E41;
  color:# ffffff !important;
}
itemInput input:focus {
  border: 1px solid# ffffff;
}
itemInput input::placeholder {
  font-family: 'Karla', sans-serif;
}
updateForm label {
  /* display: block; */
  margin-bottom: 2rem;
  font-size: 1.3rem;
  font-weight: 700;
}
addItemButton {
  border: unset;
  background-color:# ffffff;
  color:# 3E3E41;
  padding: 0.4rem;
  cursor: pointer;
  width: 13.5rem;
  height: 3.6rem;
  border-radius: 3px;
  font-size: 1rem;
  margin: -2px;
  font-family: 'Karla', sans-serif;
}
.plus-sign{
  background-color:# 1b1a1b;
  color:# ffffff;
  padding: 7px 10px;
  border-radius: 70px;
}
.deleteSign{
  background-color:# ffffff;
  color:# 000000;
  padding: 9px 14px;
  border-radius: 70px;
  font-size: 1.3rem;
}

.item {
  width: 60rem;
  margin: 20px auto 0 .5rem;
  padding: 0px 10px;
  min-height: 2.8rem;
  display: grid;
  grid-template-columns: 1fr 4fr 1fr;
  align-items: center;
  margin-bottom: 0.5rem;
  border: 5px solid white;
  border-radius: 5px;
  box-shadow: rgba(60, 64, 67, 0.3) 0px 1px 2px 0px, rgba(60, 64, 67, 0.15) 0px 1px 3px 1px;
}

.checkbox {
  height: 60%;
  width: 2.5rem;
}

.itemInfo {
  text-align: center;
  font-size: 1rem;
  font-weight: normal;
}


.deleteButton {
  border: unset;
  font-size: 0.8rem;
  cursor: pointer;
  background: transparent;
}


.deleteButton:active {
  margin-top: 3px;
}

.purchased {
  background: red;
  color:# fff;
  min-height: 3.8rem;
}
totalPriceDiv {
  font-size: 1.6rem;
  font-weight: 700;
  text-align: center;
}

.Emilson {
  font-size: 1.2rem;
  font-weight: 700;
  text-align: center;
  color:# aaaaaa;
  padding: 4.5rem 0rem;
  text-align: center;
}

@media screen and (max-width: 900px) {
 # itemInput {
    display: grid;
    grid-template-columns: 2fr;
    grid-gap: 15px;
    place-content: center;
  }
 # itemInput input {
    width: 20rem;

  }
 # addItemButton {
    width: 20rem;
    height: 3.6rem;
  }
  .item {
    max-width: 18rem;
    margin: auto;

  }
  .itemContainer {
    margin: 30px 0px;
  }
 # totalPriceDiv {
    font-size: 1.6rem;
    font-weight: 700;
    text-align: center;
  }
  .createNewListDimain-section {
    padding: 1rem 2rem;
  }

  .paragraph, .heading{
    text-align: center;
  }
  .purchased {
    background: red;
    color:# fff;
    min-height: 3.7rem;
  }
}

.modal {
  display: none;
  position: fixed;
  z-index: 1;
  left: 0;
  top: 0;
  width: 100%;
  height: 100%;
  overflow: auto;
  background-color: rgb(0, 0, 0);
  background-color: rgba(0, 0, 0, 0.4);
}
.modal-content {
  background-color:# fefefe;
  margin: 15% auto;
  padding: 20px;
  border: 1px solid# 888;
  width: 80%;
}
.close {
  color:# aaa;
  float: right;
  font-size: 28px;
  font-weight: bold;
}

.close:hover,
.close:focus {
  color: black;
  text-decoration: none;
  cursor: pointer;
}

button {

  /* margin: 10px; */
  background-color:# 018C40;
  color: white;
  border: none;
  padding: 16px 32px;
  text-decoration: none;
  margin: 4px 2px;
  cursor: pointer;
  -webkit-transition: all 0.5s;
  -moz-transition: all 0.5s;
  -o-transition: all 0.5s;
  transition: all 0.5s;

}
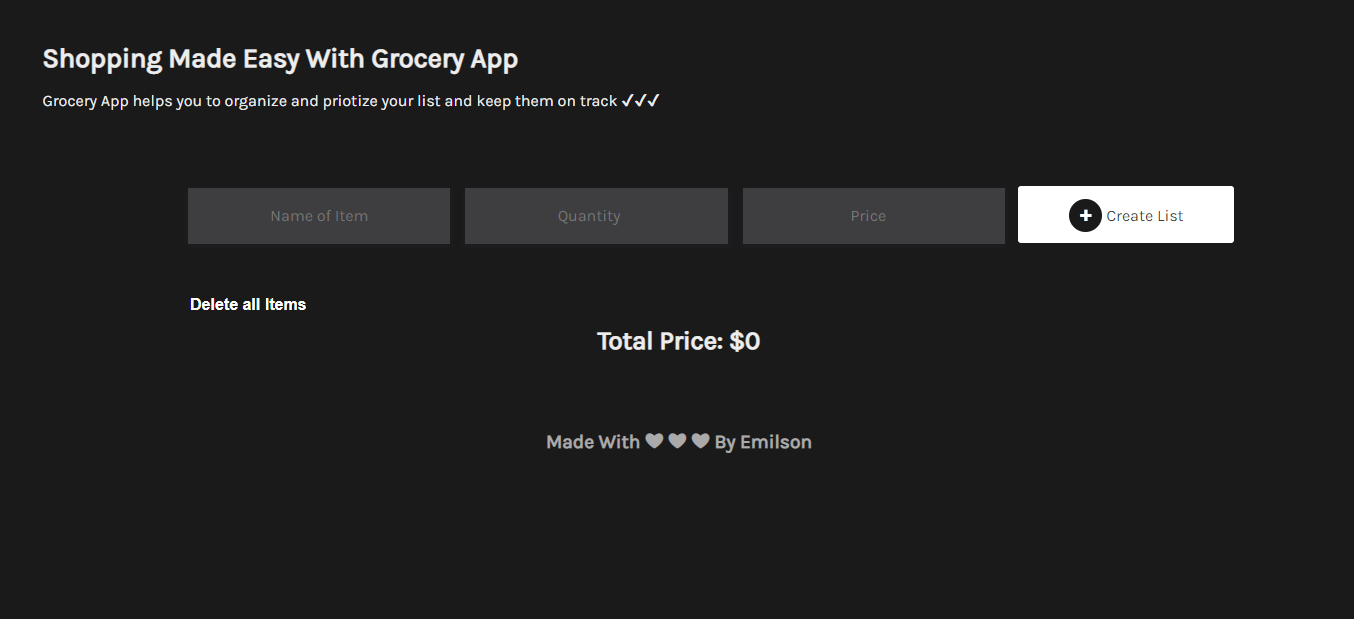
Here is the final output of what our application should look like
Setting up Dexie.Js
For us to store our items, we need to set up Dexie.js. Dexie.js is a lightweight indexedDB database library with relatively close performance and a simple interface.
There are tons of ways we can implement dexie.js in our code such as copying the CDN link or installing it. But in this article, we won't be copying the CDN link, because our service worker will not be able to cache the file in the browser.
Installation Dexie.js
To install the library, we will go to the documentation, scroll to the download button and click on it.
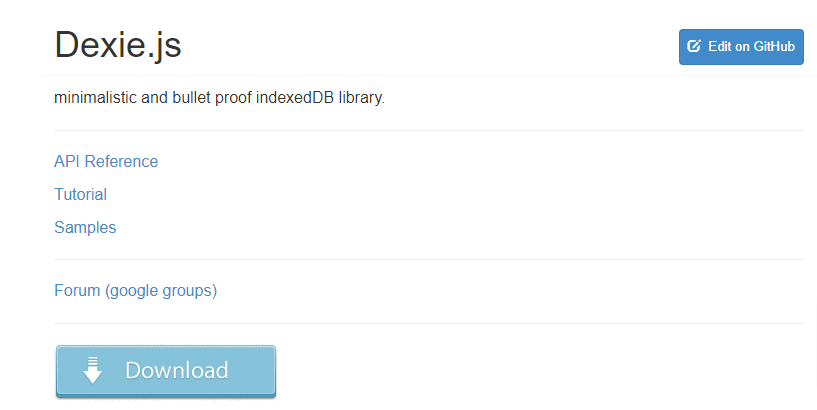
Next, we will be redirected to the download page where we will see different options. Click on the second link
https://npmcdn.com/dexie/dist/dexie.min.js
We will copy or save the code we see on the page we were redirected to when we clicked on the link above.
After setting up our database library which is Dexie.Js, we will create a new indexDB database with dexie.js and the name of our database.
const db = new Dexie('GroceryApp')
Next, we will define the structure of our database.
db.version(1).stores({ items: '++id,name,price,isPurchased' })
After creating and structuring our database, we will need to fetch our items
const itemInput = document.getElementById('itemInput')
const newItemsDiv = document.getElementById('newItemsDiv')
const totalPriceDiv = document.getElementById('totalPriceDiv')
const createNewListDiv = document.getElementById('createNewListDiv')
Adding a new item to the IndexDb database
Now let’s add our new item to our database, to do that we will create an event listener, to prevent default submission, next we will create a function for the items we need in our database such as name, quantity, price, after that we will add those items to our database. So when a user fills in each of the items and clicks the submit button the data will be submitted to the database.
itemInput.onsubmit = async (event) => {
  event.preventDefault()
  const name = document.getElementById('nameInput').value
  const quantity = document.getElementById('quantityInput').value
  const price = document.getElementById('priceInput').value
  await db.items.add({ name, quantity, price})
  await populateNewItemsDiv()
  itemInput.reset()
}
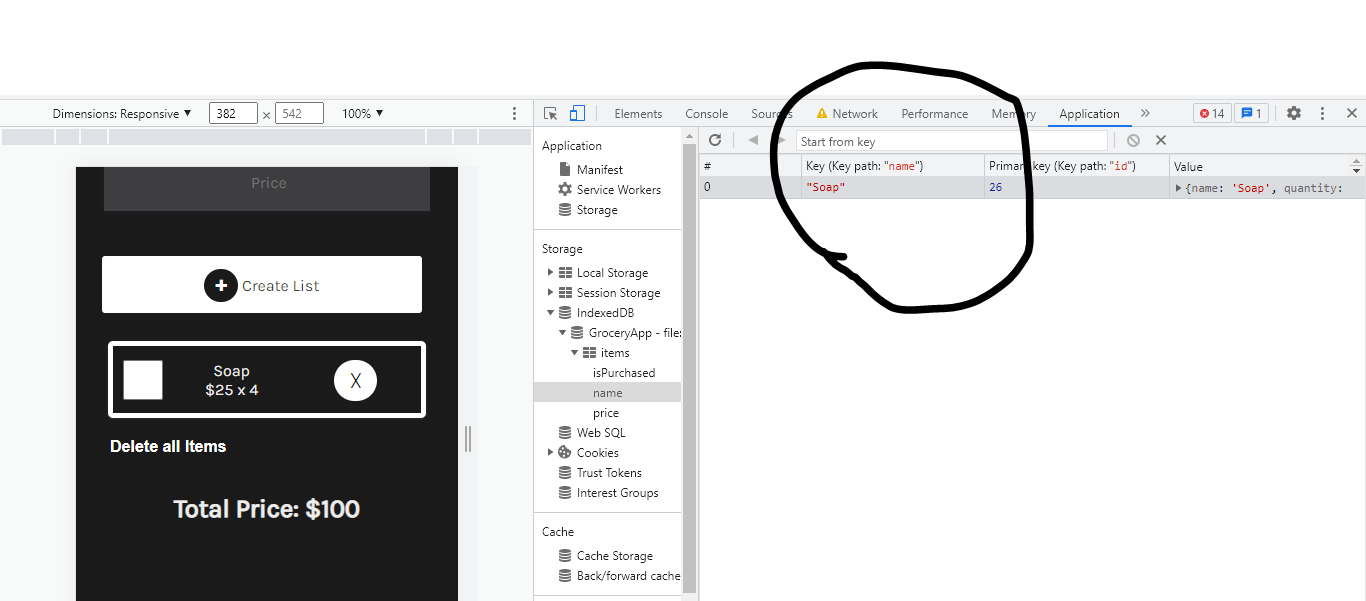
Example: The picture below is an example of a new item we created “Soap” and submitted to the database.
Displaying items in the Shopping app
After creating and submitting our item to the database, we need to display the item on our browser to achieve this we will create an asynchronous function “populateNewItemsDiv”
const populateNewItemsDiv = async () => {
  const allItems = await db.items.reverse().toArray()
  newItemsDiv.innerHTML = allItems.map(item => `
    <div class="item ${item.isPurchased && 'purchased'}">
      <input
        type="checkbox"
        class="checkbox"
        onchange="toggleItemStatus(event, ${item.id})"
        ${item.isPurchased && 'checked'}
      />
      <div class="itemInfo">
        <p>${item.name}</p>
        <p>$${item.price} x ${item.quantity}</p>
      </div>
      ${!item.isPurchased ? `<div class="itemChange">
      <button onclick="removeItem(${item.id})" class="deleteButton">
      <span class="deleteSign"># 9747</span>
      </button>
      </div>`: ``}
    </div>
  `).join('')
  const arrayOfPrices = allItems.map(item => item.price * item.quantity)
  const totalPrice = arrayOfPrices.reduce((a, b) => a + b, 0)
  totalPriceDiv.innerText = 'Total Price: $' + totalPrice
}
window.onload = populateNewItemsDiv
Updating data in our database
In this section, we created a toggle function, that helps in displaying items that are purchased and not purchased.
// add toggle toggle item status
const toggleItemStatus = async (event, id) => {
  await db.items.update(id, { isPurchased: !!event.target.checked })
  await populateItemsDiv()
}
Deleting Data from our Database
When creating a new item, we may also want to delete a single item from our database. We can do that by simply creating a new function "deleteItem" which will be an asynchronous function that will expect an id argument.
// delete item from database
const deleteItem = async id => {
  await db.items.delete(id)
  await populateItemsDiv()
  defaultView(true)
}
Next, if we need to delete all the items from our database, we will create a new function called “deleteAllItems”
"deleteAllItems"
// delete all item from database
const deleteAllItems = () => {
  db.items.clear()
  populateNewItemsDiv()
  defaultView(true)
}
Setting Up Workbox for PWA
For us to build a Progressive web application with offline functionalities, we will have to work with the workbox library.
Installation
Before installing workbox, you have to visit the official website to check if workbox is supported on your browser.
To setup workbox, we will install it globally with the CLI via npm Run this command on your terminal
npm install workbox-cli --global
After installing workbox globally, copy the code below and paste it into your terminal, to do that, first, you need to cd into the directory you are working on.
workbox wizard
Next, you will be asked a couple of questions
C:\Users\user\Desktop\grocery-app>workbox wizard
? What is the root of your web app (i.e. which directory do you deploy)? (Use arrow keys)
> assets/
  css/
  scripts/
  ──────────────
  Manually enter path
The default selection is an asset, but click on the "Manually enter path" option.
In this option, hit enter after typing "./"
Please enter the path to the root of your web app: ./
? Which file types would you like to precache? (Press <space> to select, <a> to toggle all, <i> to invert selection)
>(*) jpg
 (*) png
 (*) css
 (*) html
 (*) json
 (*) js
In the option above, We will precache all of the listed options
? Where would you like your service worker file to be saved? (sw.js)
Hit the enter button for the option above.
? Where would you like to save these configuration options? (workbox-config.js)
We will save our configuration in the workbox-config,.js file so hit the enter button.
? Does your web app manifest include search parameter(s) in the 'start_url', other than 'utm_' or 'fbclid' (like '?source=pwa')? (y/N)
For the next question, select the option "N"
Finally, our workbox-config.js file has been created successfully.
Note: We can customize our service worker by making changes to our workbox-config.js file.
The next step is to build our service worker by running this command
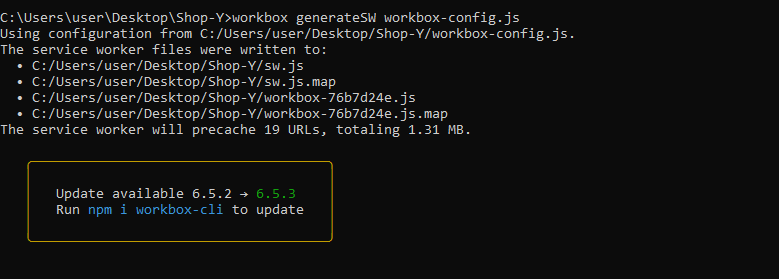
workbox generateSW workbox-config.js
We have generated our service worker successfully
Next, we will copy the service worker script into our HTML
<script>
        if ('serviceWorker' in navigator) {
            window.addEventListener('load', () => {
                navigator.serviceWorker.register('./sw.js');
            });
        }
    </script>
Note:
There are tons of ways we can use workbox but this is the approach we will use in this article
You can check out the full project on GitHub
Conclusion
Wow! That was a long one. In this article, we gave a brief introduction to IndexDB, PWA, and Workbox, how to store your data offline with IndexDB using the library Dexie.js.We also implemented a progressive web app that is installable using workbox and service worker.
If you enjoyed reading it you should sign up to JavaScript Works for more content like this coming straight to your inbox!
Ezekiel Lawson
Front-end developer with 2+ years of experience converting your design ideas into interactive and responsive website using HTML, CSS, JavaScript, and Vue
See other articles by Ezekiel

WorksHub
Jobs
Locations
Articles
Ground Floor, Verse Building, 18 Brunswick Place, London, N1 6DZ
108 E 16th Street, New York, NY 10003
Subscribe to our newsletter
Join over 111,000 others and get access to exclusive content, job opportunities and more!